Deploying private Docker image to AWS Beanstalk (Amazon Linux 2) using docker-compose.yml
In this article I'm going to go over the steps to set deploy a private docker image on Elastic Beanstalk using docker-compose.yml. Beanstalk deployment supports docker-compose.yml out of the box and executes it when you push a zip containing this file. However, the AWS documentation is not very clear on how to authenticate with docker hub using this approach. Also, their documentation is not very clear about the fact that their new docker beanstalk instance that uses Amazon Linux 2 doesn't support their proprietary Dockerrun.aws.json file for multi-container applications (it only supports Dockerrun.aws.json version 1). So if you're trying to deploy a multi-container application and don't want to use the depricated Docker Multicontainer Beanstalk environment, then this is the approach you'd have to follow.
Pre-reqs & Assumptions
For the purpose of this article I'm going to assume that you already have a dockerized application which is pushed to a private repository on docker hub. Also, I'm not going to go over the steps to set up continuous deployment using this method. If you'd like to learn more about that, then you can follow the steps in this article
Here we're only going to go over authenticating beanstalk with docker hub when using docker-compose.yml
Approach
The overall approach is quite simple. We'll use the config.json file that docker uses on linux to authenticate all requests going to docker hub. We're going to use beanstalk's pre-deployment hooks to copy this config file from a bucket in S3 and place it in our instance at ~/.docker/config.json location. Once the pre-deployment hooks completes this setup, beankstalk is going to run our docker-compose.yml file and deploy our application.
IAM Set up
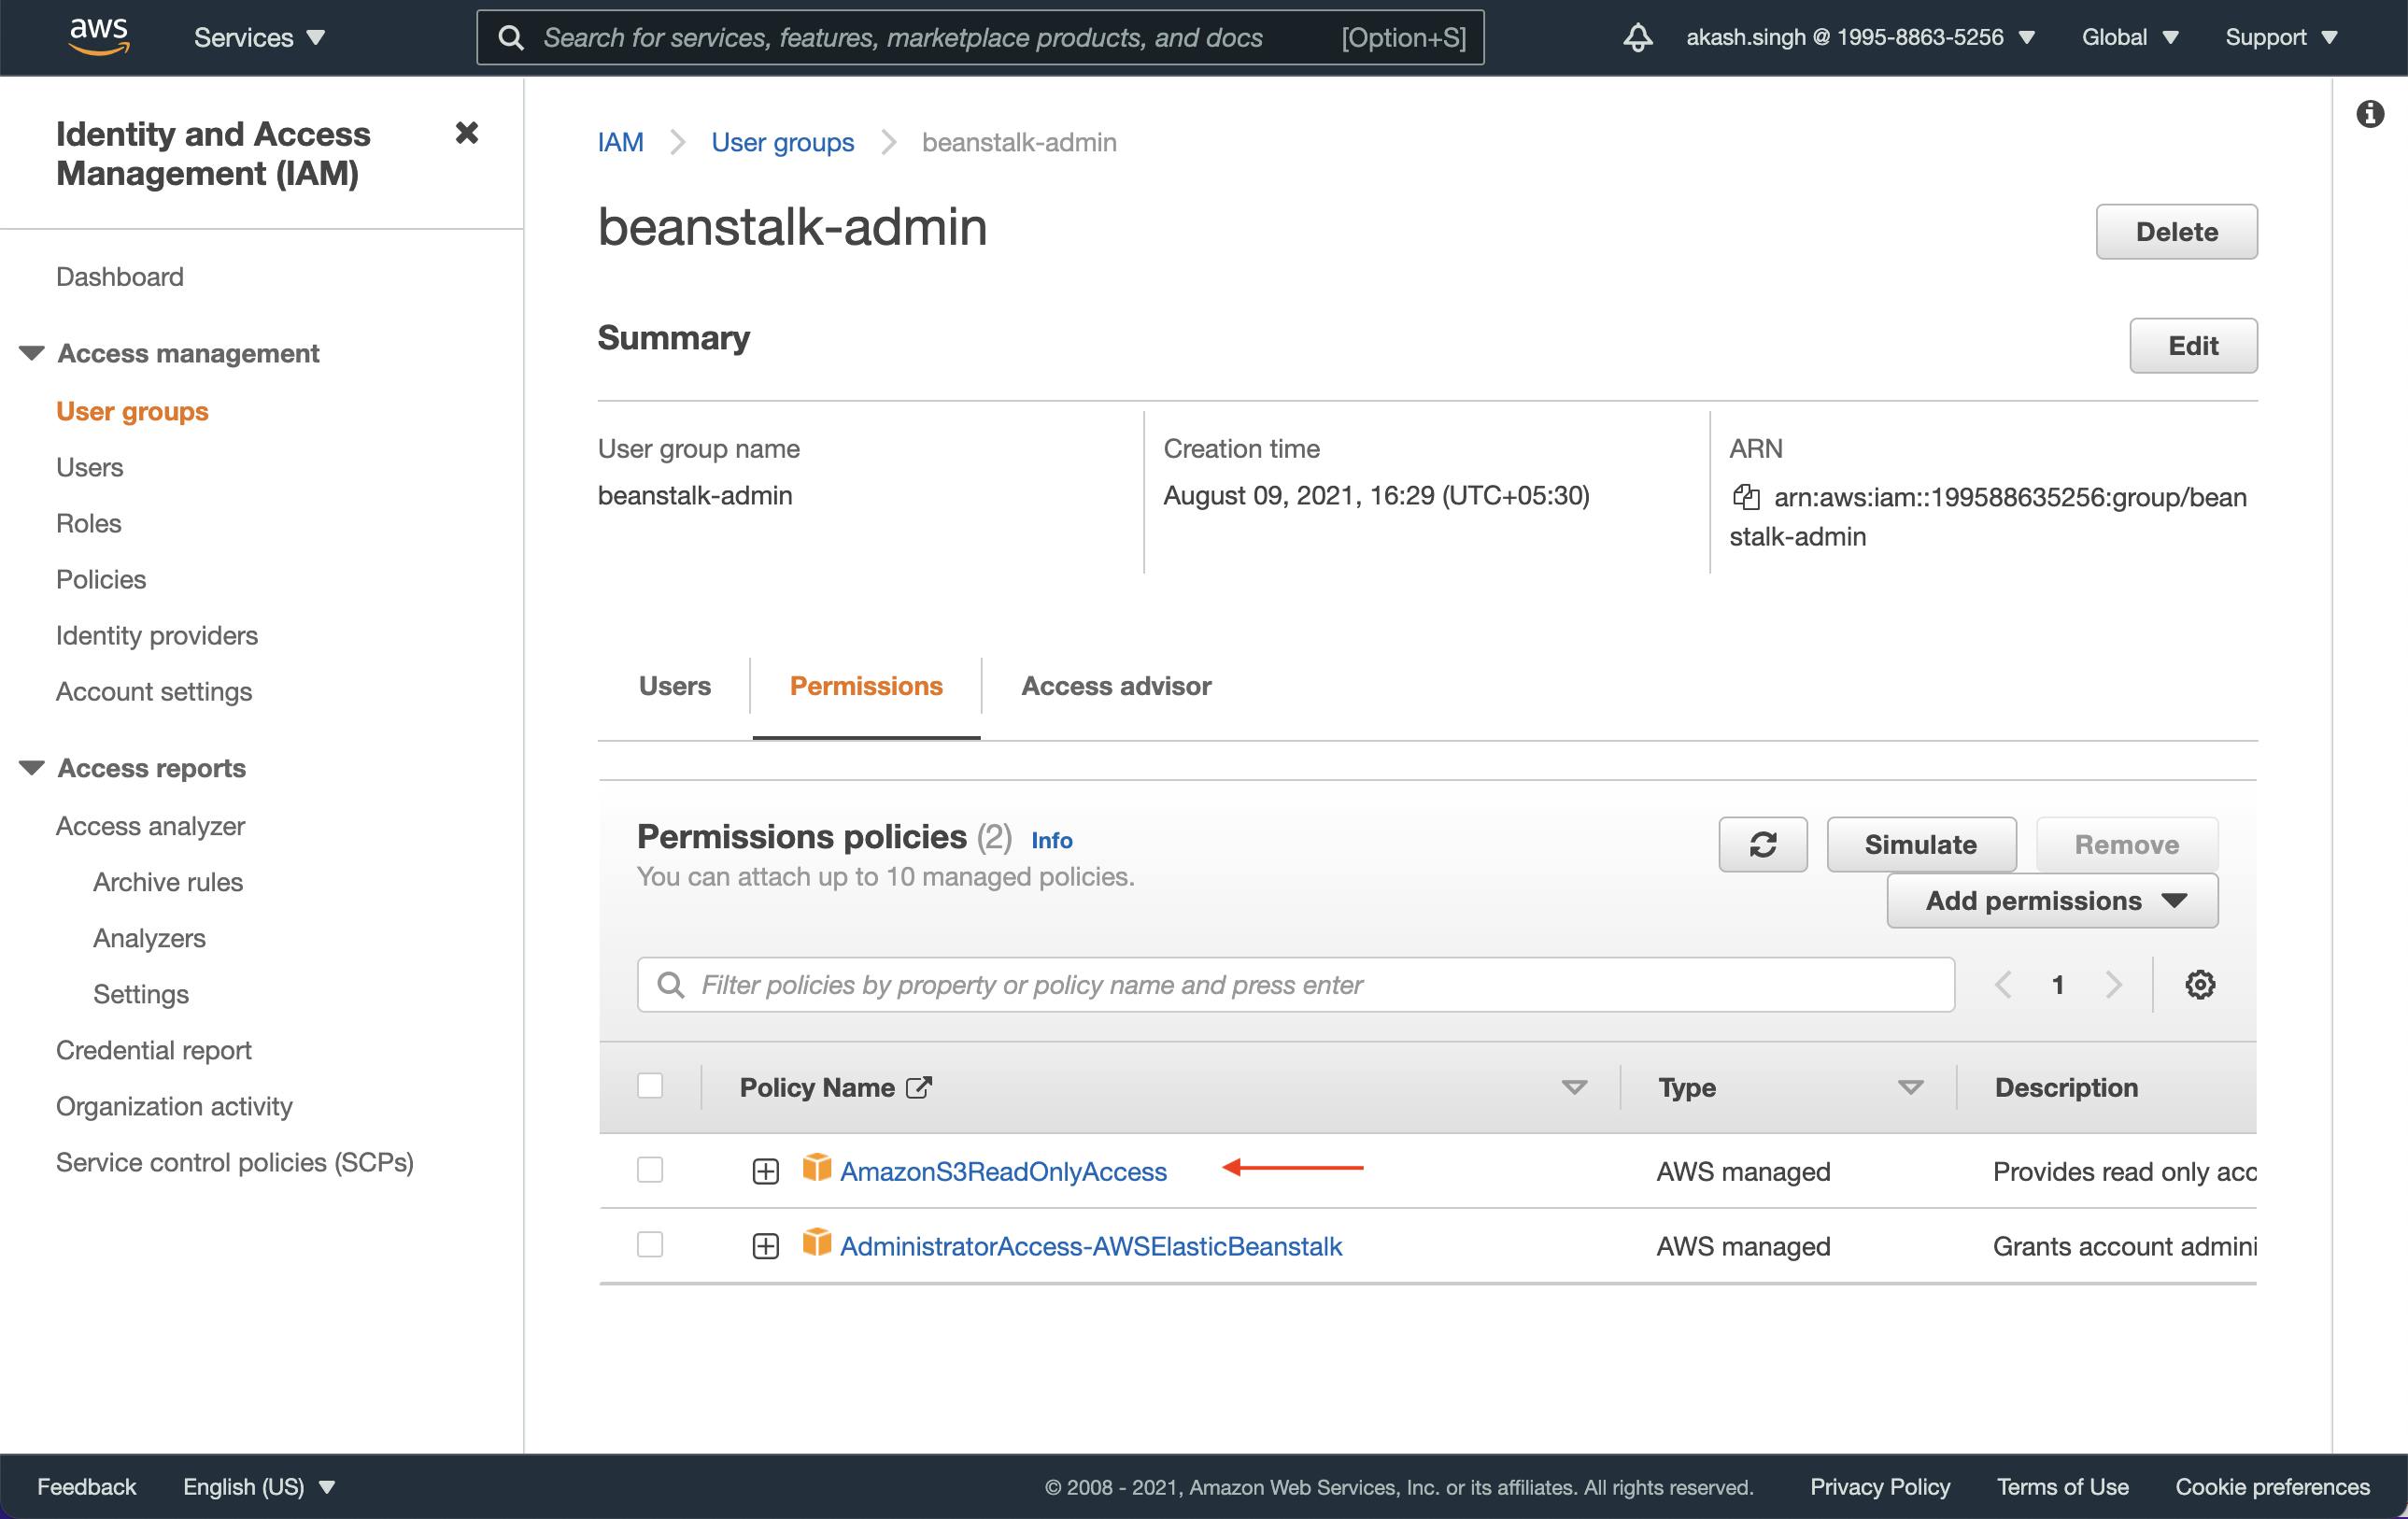
We need to give AmazonS3ReadOnlyAccess permission to the IAM user that will be running the deployment on beanstalk. Usually it will be the programmatic access user that will be deploying to beanstalk from the continuous deployment platform (eg. Github Actions).
The user permissions should look something like this

Creating config.json File
This is what the contents of the file should look like:
{
  "auths": {
    "<docker url>": {
      "auth": "<your auth token>"
    }
  }
}
Now the easiest way to create this file is by running the command docker login in your terminal and then copying the contents from the config.json file stored in ~/.docker/ folder (Windows folk, please Google the location). Now the problem here is that on macOS you'll see something like this:
{
  "auths": {
    "https://index.docker.io/v1/": {}
  },
  "credsStore": "desktop",
  "experimental": "disabled",
  "stackOrchestrator": "swarm"
}
This is because docker is using your keychain api to securely store the auth token instead of writing it to a file. Which is great, until you need the token. But thanks to the power of Stackoverflow, I learned that you can generate the authorization string by running this in your terminal:
echo -n '<docker hub username>:<docker hub password>' | base64
Once you have this, create the config.json file as above (with the auth token) and save it on your computer. Remove all the unnecessary lines from the file and only keep the auths object in there. The final version should look like this
{
  "auths": {
    "https://index.docker.io/v1/": {
      "auth": "78VuZGVyZm9vdHgadGVybmFsZG9vbag"
    }
  }
}
Setting up S3
Now let's go to S3 and create a new bucket. We'll call it docker-login-bucket but you can call it anything you like. Make sure you uncheck the Block all public traffic option. Once the bucket is created we'll upload the config.json file which we created in the previous step. On the Upload page, after you select the file expand the Permissions section and select Specify Individual ACL Permissions and after that enable both Read access for the third option, Authenticated User Groups. This will allow our beanstalk user to read the contents of this file.
Platform Hooks
Now the last step is to create a pre-deployment script that will copy the file from S3 to our instance before running the docker-compose.yml file. Beanstalk supports predeploy hook which runs all executable scripts in .platform/hook/predeploy/ folder in the deployed package (zip).
Creating the script
Let's create the script that will copy the file from S3 to our instance. I'm calling it docker_login but feel free to call it whatever you like. It should have the following contents
#!/bin/bash
aws s3 cp s3://<bucket name>/config.json ~/.docker/config.json
I named my bucket docker-login-bucket so for me the line should look like this
aws s3 cp s3://docker-login-bucket/config.json ~/.docker/config.json
Setting the script as executable
We need to set the script as executable so that beanstalk can run it without any issues. Once you have the file created just run this command in your terminal
chmod +x ./config.json
Make sure that the file is in the correct location in your deployed package so that beanstalk can find it and execute it. Your folder structure should look like this
└──📜docker-compose.yml
└──📂.platform
    └──📂hook
        └──📂predeploy
            └──📜docker_login
Now when you push this deployment package, beanstalk will copy the config.json to the right location so that docker can find it and authenticate with docker hub to pull images from a private repository. 🎉
